Windows Client installation
Download the AB Tutor install file (ABTutor.msi) from the Dashboard on your Central Server. This single installer file is used to install the specified components (Client and/or Console) and manages updates. The Client needs to be installed on any computer you wish to be able to control with AB Tutor.
Interactive install
To install AB Client using the installation wizard, please first ensure you are running as a Windows Administrator then double click the ABTutor.msi installer.
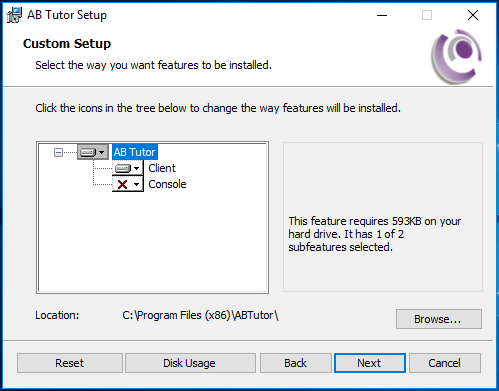
Read and accept the licence agreement, then select which components you wish to install. If this computer is only going to be used by students, leave Console unselected, if it is to be used to control as well, select Console.

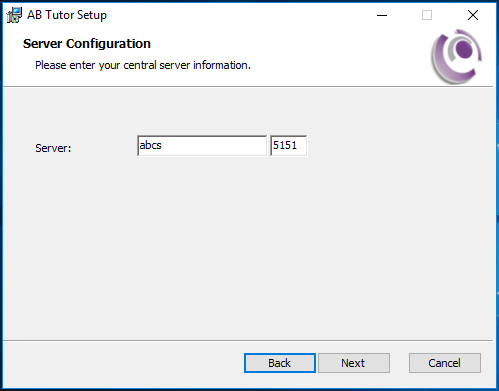
Next, enter the hostname and port of the Central Server. This will work with the IP address as well, but this will cause problems if the server's IP address changes in the future.

If you are installing on Windows 7, you will have the option to install the Mirror Driver. This is optional, but will improve performance during Watch and Demo.
When you click Install the selected components will be automatically downloaded from the Central Server and installed.
After install, the client needs to be authorised on the Central Server. To do this, log in to the web interface and select Devices. This will show a list of unauthorised clients - you can click Accept next to a client to accept just that one, or Accept All to accept them all in one go.

Silent install
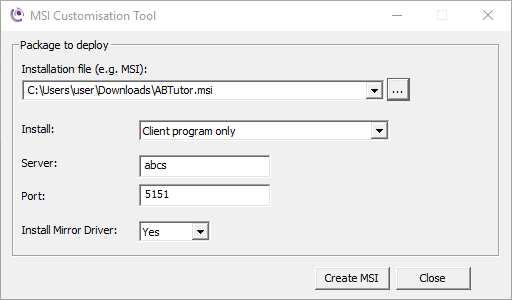
For large numbers of computers, a manual install as described above isn't practical. As AB Tutor is provided as an msi file, it can be pushed out with software such as Active Directory Group Policy or SCCM. If you are just installing the Client and your DNS points abcs to your Central Server, you can just push the msi out without any changes. If you need to modify the settings, you can use the AB Installer Modification Tool, which can be downloaded from the main dashboard of the Central Server web interface.

First, select the MSI file you downloaded from the Central Server, then set the options as required. When you select Create MSI, a new file will be created in the same location as the original with the new settings saved in it.
Once installation has finished, you can authorise the Clients on the server as described above.
Notes
 No icons are created if you just install the Client component. To uninstall the client you must go to Control Panel - Add/Remove Programs. This will only be possible if you have not chosen the option to prevent the client program from being uninstalled via the Web Interface. For more information, see Additional Security.
