Group settings
Once your groups have been created and populated, there are other settings that can be applied to them. These are found by right clicking on the group and selecting Properties. This will bring up a window with a number of tabs:

Members
We have already covered Members in the previous section - this is where devices or users are added to the group.
Default Policies
Default policies are policies which will always be applied to any members of this group. If the group is a Device Group, those computers will always be affected by them. If it is a User Group, the policies will be applied to any computer those users log in on, for as long as they are on the computer.
 Note that policies applied due to being a group member can only be removed from this menu - they can't be removed by right clicking on them.
Default policies can also be set for All Items by a Console Administrator - either to devices (always applied) or to sessions (applied whenever a user is logged in). This is done by right clicking on All Items and selecting the type of default policy you wish to apply. This will open a window allowing you to select which policies are to be applied by default.
Restrictions
Restrictions are controls on what Console Users can do with this group. For example, the Administrator can restrict them from watching or demoing to those computers.
 If a computer is in multiple groups with different Restrictions, the Restrictions for the currently selected group will apply. If both groups are selected, the Restriction will only be applied if it's set on both groups.
| Restriction | Description |
|---|---|
| Disable Watch | Prevents the Console user from Watching Clients |
| Disable Remote Control in Watch | Prevents the Console user from controlling Clients |
| Disable Demo | Prevents the Console user from Demoing their screen to remote machines |
| Disable Exhibit | Prevents the Console user from Exhibiting one Client's screen to other Clients |
| Disable Launch | Prevents the Console user from launching applications etc on the Clients |
| Disable Close Application | Prevents the Console user from using the Close Application option in the Launch menu |
| Disable Close Window | Prevents the Console user from closing windows on the Client by right clicking in the main view |
| Disable Text Chat | Prevents the Console user from using the Chat feature |
| Disable Audio Chat | Prevents the Console user from using the Audio chat feature |
| Disable Send Messages | Prevents the Console user from sending simple messages |
| Disable Request Name | Prevents the Console user from sending requests to Client users to enter their actual name |
| Disable Clear Name | Prevents the Console user from clearing names set by Request Name |
| Disable Snapshot | Prevents the Console user from taking screenshots of the Client with Snapshot |
| Disable Capture | Prevents the Console user from using the remote screen capture |
| Disable Lock/Unlock | Prevents the Console user from Locking or unlocking Clients |
| Disable Send Files | Prevents the Console user from sending files to Client machines |
| Disable File Transfer | Prevents the Console user from transfering files back and forth to Clients |
| Disable Collect Files | Prevents the Console user from collecting Client files |
| Disable Key Sequence | Prevents the Console user from sending key sequences to Clients |
| Disable Log On | Prevents the Console user from logging on Clients |
| Disable Log Off | Prevents the Console user from logging off Clients |
| Disable Power On | Prevents the Console user from turning Clients on remotely |
| Disable Reboot | Prevents the Console user from rebooting Client machines |
| Disable Shutdown | Prevents the Console user from shutting down Client machines |
| Disable Polling | Prevents the Console user from using the Poll and Easy Poll features |
| Disable View Log | Prevents the Console user from accessing the event logs from the Central Server |
| Disable Events Pane | Prevents the Console user from seeing the Events Pane at the bottom of the Console |
| Prevent applying/removing policies | Prevents the Console user from applying or removing policies to/from Clients |
Permissions
The Permissions tab allows you to set which users are allowed to use the group. This is typically used to ensure teachers only have access to the computers in the rooms they use and to reduce the chance of them accidentally taking control of the wrong computers. It also can be used to prevent teachers having access to groups containing other staff members' computers. If the list is left blank, all users will have access to the group.
To add users to the list, select the Add button and highlight the users you wish to add. The list will show all console users, but will not display Web Admins or Client Users (unless those users also have Console user roles).

Schedule Wake on Lan
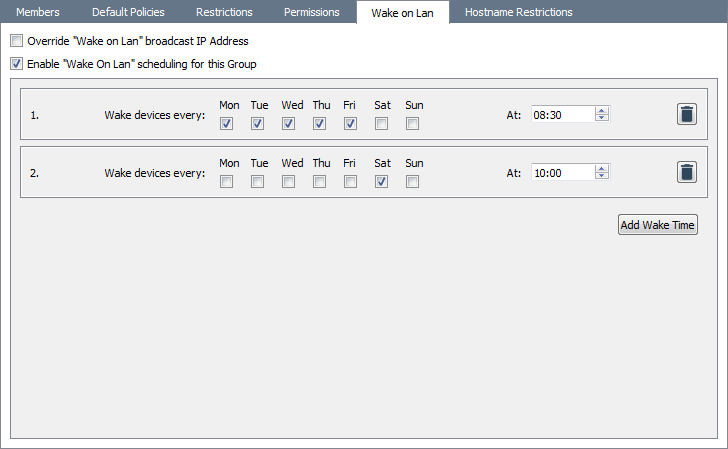
This option allows AB Tutor to be set to automatically power on the computers in the group at a specific time. To configure this, click Add Wake Time to create a new entry then set the days and time you wish the computers to wake. If you wish it to happen at different times on different days, you can set additional times by clicking Add Wake Time again. Note that this relies on the server's system clock - if this is wrong, or set to a different time zone, this option may wake the clients at the wrong time.
The Override IP Address option allows the WoL packets to be sent across subnets, provided the network supports it. The WoL schedule can be enabled or disabled using the tickbox, allowing it to be turned off for the whole group easily, without losing the set times.

Hostname Restrictions
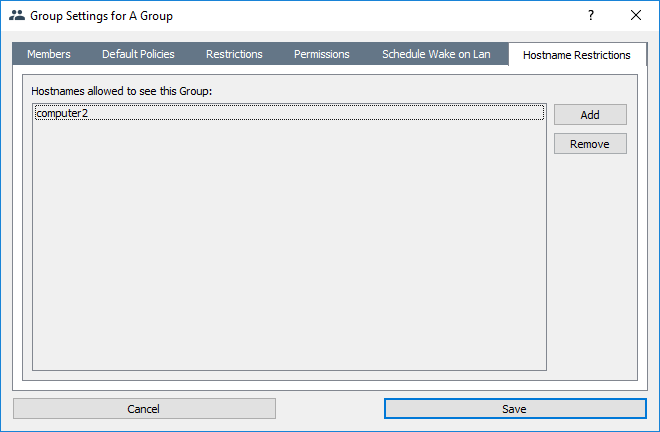
This list controls which computers are allowed to open this group. Like the user Permissions a blank list means that the group can be opened on any computer, any entries added will restrict the group to those computers. Note that admins always have access to every group on the system.

A user must have permission both by username AND hostname to have access to a group - if they are in the username permissions list but not the hostnames list (and the hostnames list isn't blank) they won't be able to see that group.
