
Admin Manual
Creating Groups
AB Tutor allows client computers to be assigned to groups, typically one per classroom. This allows the Console User to easily access computers in one area, without having to worry about affecting computers in a different part of the site. It also allows Administrators to lock Console Users down to only accessing specific groups, reducing confusion and preventing teachers causing problems for each other.
It is also possible to create groups of Client Users. If a group contains users, AB Tutor will display any computers which that user is logged in to. If they aren't logged in, nothing will be displayed for that user in the Devices tab, however they will be shown as offline on the Users tab. If Groups is selected, the members of all the groups that the current user has access to will be displayed.
If ABTutor is run by a Console Administrator, an additional entry called All Items will be displayed above the list of groups. This option, as the name suggests, shows all known items of the type selected by the tab at the top of the Main Panel (eg. users, devices, etc).
Groups can be created by right clicking on the Groups entry in the Groups Panel, selecting New Group and then the type of group required. Alternatively, they can be created by dragging devices onto the Groups entry.
Types of groups
By default, AB Tutor allows 2 main types of group. There are some optional extra groups which can be enabled in by going to Tools, Settings, Advanced Group Types.
Standard group types
 Device groups
- are the standard AB Tutor group - they allow the user to see specific machines and what is being done on them.
 User groups
- allow specific users to be added. They will be shown in AB Tutor no matter what machine(s) they log in to. This allows policies to be set to follow users around the site, without affecting other users.
Optional group types
 Dynamic groups
- work the opposite way round to normal groups - a teacher will create a group and the users choose to join the group. This is useful if users have their own laptops they take with them and can be in a large number of different combinations where it wouldn't be practical to create device or user groups in advance.
 Hostname groups
- work similarly to device groups, however instead of adding a specific registered device, the hostname can be entered and AB Tutor will use string matching to check whether clients belong in that group. Device groups will generally be used instead, however sometimes it may be easier to create a group with strings than selecting.
 Username groups
- work similarly to user groups, however they use string matching instead of working from the list of registered users. These may be useful if the users haven't been registered in the Central Server, but you still want to have them in groups.
 Note that the number of entries in some group types may vary. For example, if a user in a user group logs on to 2 computers, they will have 2 entries in the Devices column, but only one in the Users column. If they log off all their machines, they won't appear in the Devices column, but will appear as offline in the Users column. Similarly, in a devices group, a device will always show in the Devices column with one entry (which may be offline), but may appear multiple times in the Users tab, if multiple users are logged on to it.
More group types may be added later!
Adding entries to groups
There are several ways to add entries to groups, depending on the type of group.
Device/User groups
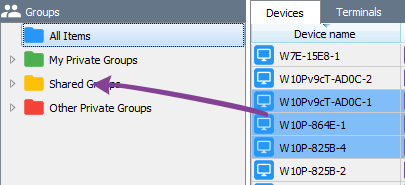
Drag the entries from All items or from another group onto My Private Groups or Shared Groups. This will create a new group of the appropriate type and add the entries to it.
Drag the entries from All Items or from another group onto the group name.
Through Group Properties:
Right click on the group name and select Properties.
On the Members tab, select Add.
Select the required entries. Clicking will select or deselect, dragging will select/deselect all the entries dragged over.
Click Add and Save to finish.
Through Active Directory sync. Please see AD Sync for more information.
Hostname/Username groups
Members can only be added to string match groups through Group Properties.
Right click on the group name and select Properties.
On the Members tab, there are a variety of ways to add to the group:

Add allows a single entry to be added.
Add range allows a large number of entries to be added in one go, if they have sequential numbers, eg comp1, comp2, comp3 etc.
Bulk add allows a large number of entries to be typed or pasted in at once.
Remove allows entries to be deleted.
Import and Export allow existing group lists to be backed up and restored.
Once all the required entries have been added, click Save to finish.
Dynamic groups
Dynamic groups are not created in advance by an administrator, they are created as and when required by the users. A dynamic group is created by right clicking on Groups and selecting New Dynamic Group. Users can then by right click on the AB Tutor icon in the system tray, which will open the following menu:

They can then select the group they wish to join, enter the password (if any) and click OK to join.
Private Groups
Private groups can only be created by Console Administrators and users with the Private Group Creator role. These groups are shown separately from the Shared Groups and are hidden from other normal level users. Console Admins can see Private Groups belonging to other users in the Other Private Groups section.